Tuesday, August 28, 2012

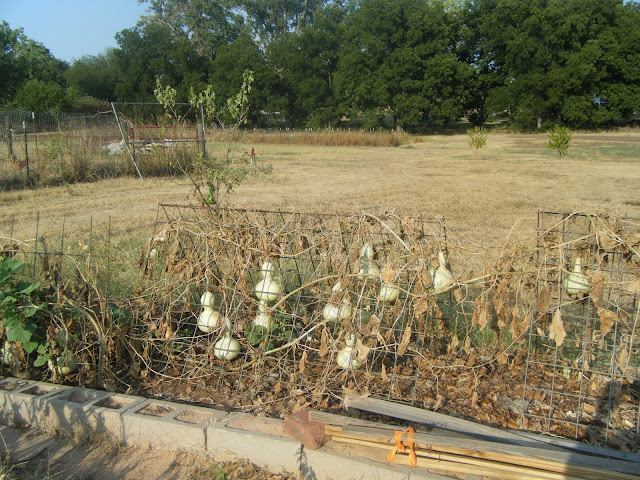
Gourd Graveyard

On June 30th, I wrote an article about the gourds we are growing this year.

http://windyacresnaturalfarm.blogspot.com/2012/06/gourds-running-rampant.html

The vines were going strong at that point even though we had had very little rain.  Shortly after that, we had some of the hottest days I have ever seen in all my 42 years living in Oklahoma.  High temperatures in excess of 110 degrees were common for several weeks.  Finally, the temperatures moderated a bit and, recently, we got some desperately needed rainfall.  

All this took its toll on the gourds and most of the gourd vines have died.  They might have done somewhat better had I remembered to water them a bit more.  :-(  However, even though the vines have mostly died, most of the gourds were mature enough that it looks like they will dry nicely.  In fact, after the vines died, I was amazed to see how many gourds there were hiding under the leaves and in the grass.  Here are some pictures of them.


Tuesday, August 21, 2012

Freezing Peppers

I think I mentioned in an earlier post that we are taking a "vacation" until cooler weather arrives. The heat and drought have taken a toll on both our crops and our bodies.  So, Tom is making plans for a fall garden and I am working at preserving the produce that is left.

Before the heat scorched them, Tom picked the best bell peppers we had left in the garden and brought them in.  The best way I have found to preserve peppers is to freeze them.  Here's what I do.

I cut them open, take the seeds out and dice them into pieces.  Then I place them on a cookie sheet like this.


We had quite a variety of different colored peppers this year.  The red ones are actually pimento peppers.  Most of us have only tasted these pickled and stuffed into green olives.  However, when you eat them raw, they taste about the same as bell peppers.

Next step is to put the cookie sheet into the freezer and freeze until the peppers are well frozen.   Then, I take a spatula and scoop them off the cookie sheet and into a waiting freezer bag.


You want to do this quickly before the peppers have a chance to thaw.  The advantage to dicing the peppers and  freezing them on a cookie sheet is that they will stay separate in the bag.  Then you can open the bag and remove just the amount that you need for a recipe.  Of course, these are only suitable for recipes where the peppers will be cooked.  

The peppers above filled a quart freezer back about 2/3 full.


Friday, August 17, 2012

Chicken Pen Extension

On May 10, I wrote an entry about the temporary chicken pen that we set up for the chickens to give them some outdoor space. 

http://windyacresnaturalfarm.blogspot.com/2012/05/temporary-chicken-pen.html

It was meant to be "temporary" until we (Tom) could get them something better and more permanent built.  But, the farmers' market was in full swing by then and Tom had no extra time to devote to it. 

By the time August rolled around, I was beginning to think the little temporary pen was going to have to do until this winter when we had more time!  However, our son, Nathan, and his family came to spend the weekend a couple of weeks ago and he decided the chicken pen would be a good project for him and his Dad to do while he was here.  His enthusiasm gave new life to the project and I am proud to say that the chickens now have a much bigger pen!


Among the things that needed to be done was to set a couple of posts so we could put up a gate.  These were set in concrete and Tom built a gate to go on one of them.

They also put taller posts in the middle of the pen to hold up the bird netting they strung across the top.  I wish we could just let the chickens roam free, but are afraid hawks will swoop down and get them.  

Finally, they lined the inside of the pen with some old landscaping blocks a previous owner had left on the place.  Why do this?  Well, for one thing the chickens are pretty bad about digging holes.  I know this is hard to believe and I'm not sure I would have believed it myself until I saw it.  But they will scratch and wallow out large holes in their pen.  Like most birds, they like to take dust baths and, when the weather is dry, these holes make perfect places where they can flap around and stir up dust.  I have read the dust helps to eliminate mites and other parasites in their feathers.  Since some of these holes are pretty large, the blocks around the edge keep them from wallowing out holes along the fence edge that would give predators a way get in.

The chickens love the extra space and enjoy exploring this extension to their small world.  They patrol the edges and inspect every blade of grass.  And, heaven help the poor, hapless bug that ventures into their domain.

Also, you should never go into their pen with painted toenails and wearing sandals.  Toes are tempting targets for their sharp little beaks!  I learned the hard way.  

Wednesday, August 15, 2012

Trail of Tears Beans

On June 3, I wrote a blog about my raised bed garden and how it and the chickens fared while we were gone on a short vacation.  

http://windyacresnaturalfarm.blogspot.com/2012/06/short-vacation.html

In that entry, I told a little bit about the Trail of Tears beans which were brought to Oklahoma by the Cherokee Indians on the Trail of Tears.  I grew these beans in one of my beds this year.   This is what they looked like after they grew to cover the "teepee" support structures.  I only had a small package of seed and it was only enough to make 4 of the teepees like you see below.


The bean pods started out green, like most beans, but turned a beautiful shade of purple.  


As luck would have it, I didn't get around to harvesting these before the heat and drought set in for the summer.  So, the pods got way too tough to cook as "green" beans and I decided to let them dry on the vine and collect the seed.  You may be surprised to know that the seed themselves are black!


I was able to collect about half a sandwich bag of seed. That will give me enough seed to plant a lot more teepees than I did this year.  I sure won't have enough room for these in my raised bed garden, so I may have to ask Tom to save room to plant them in the field.  Of course, we'll need a lot more poles for the teepees, too.  Maybe I'd better start sweet-talking him now to get him to go to the extra time and trouble!


Saturday, August 11, 2012

Drying Tomatoes

I have tried not to whine about the weather this summer like I did last summer.  But, it has been another terrible hot, dry summer.  In fact, it seems the drought is wider spread this year and includes all the mid-west.  This is supposed to be the worst drought since the 1930s.  At that time, it was termed the "dust bowl" here in Oklahoma.  There have been news reports that the water in the Mississippi river has dropped so low that barges are having trouble getting through certain spots in the river.

Last summer I wrote a blog entry concerning my thoughts on the drought:


I've been anxiously watching the level of water in the pond pictured there.  So far the sewer pipe is still submerged, but I'm afraid it is going to begin to show above the water any day now. In short, we need rain badly.

Ah, but that is not what I started out to write about.  So, I'd better get back on topic!  Due to the drought and hot weather, our poor tomato plants have shriveled up and died.  We just were not able to water them enough.  However, before they bit the dust, Tom picked all the fruit that was left on the vines.  He was able to salvage quite a few Roma tomatoes.  And, I had to decide how best to preserve them.  I really did not want to heat up the kitchen in order to can them and I already had quite a few in my freezer.  So, I decided to dry them.  

I had not used my food dehydrator in a couple of years, so I dug it out and dusted it off.  Here is a picture of it.


I like this kind because it brings air in from the back and blows it across the racks that are inside which exposes the food inside to air more uniformly than some other dehydrators.  

It also has controls on top where you set the appropriate time and temperature for different foods.


First step was to wash, core and slice the tomatoes.  I sliced them about a quarter of an inch thick.


Next step - place them on the dehydrator racks.


This dehydrator has 5 racks and can dry a lot of produce.  Here it is fully loaded.


I set the temperature for 135 degrees, the setting recommended for fruit.  I then set the timer for about 14 hours.  After about 8 hours, I began checking them for dryness periodically.  Here is what they looked like after they were dry.  It took some of them longer than others.  So, I removed some earlier than others and consolidated those that remained onto the other racks until they were all dry.

Isn't is amazing how much they shrunk during the drying process!

Finally, the dried tomatoes should be stored in an air tight container.  Normally, I would have used zip-top plastic bags.  But, I had this empty plastic jar that has an air tight lid.  Can you believe that I got all the tomatoes that were on those 5 trays in this one little jar!


Now, I just have to figure out how to use dried tomatoes.  Any ideas or recipes would be appreciated!

Wednesday, August 8, 2012

Chickens and Children

The grandchildren were here last weekend.  There were 5 of them in all and they are all fascinated by the chickens.   They loved to take vegetable scraps from the kitchen out to the chickens and they were constantly asking if they could pet or hold the chickens.  

I made the mistake a couple of months ago of catching a chicken and letting one of the younger granddaughters hold it.  So, now she sees herself as an expert on chickens and, much to my surprise, caught one by herself to demonstrate to the others how to catch and hold a chicken!

Now, these chickens are not necessarily tame and they will flap and cackle something fierce when you try to catch them.  So, anyway, the children were given orders that they were NOT to catch anymore chickens unless an adult was there to supervise!  To pacify them, we let them go  look of eggs every day....several times per day, in fact.

One time, one of them asked Tom if she could go look for eggs.  He said, "Sure" and then got busy doing something else.  So, it was quite a while later that he realized she had not come back.  Upon going to check on her, he found her and 2 of the others standing in the chicken coop watching a chicken sitting on a nest.  They were "waiting" for the chicken to lay her egg and get up!  He shooed them out, telling them that the chicken needed "privacy".

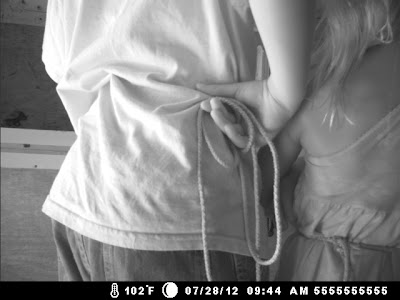
Later that day, he retrieved the wildlife camera that we had placed in the chicken coop to monitor when the chickens were laying eggs.  We all had to laugh at the sequence of pictures it caught of the grandkids waiting for the chicken to lay her egg.

Chicken enters nest.
Chicken is discovered by grandchild.
Second grandchild comes along

And another!  The more , the  merrier!

Getting a better look

Watching

Waiting


Watching
It was along about here that Tom came in and found them.  He went out there after lunch and got the egg.


Thursday, August 2, 2012

Peach Country Wine

A few weeks ago I ran across a reference to a book about fermentation.  I don't remember where I saw it, but it caught my attention and curiosity and I ended up ordering it.  Here it is.


It is a very interesting book and contains information on how people all over the world use fermentation to preserve food.  Examples of food created through fermentation are everywhere.  These include cheese, yogurt, sour dough, wine, beer, pickles, vinegar, soy sauce and many others.


This book has a section on making "country wine".  If you recall, last time I wrote about making peach jam.  Well, I did not use all of the peaches to make jam and still had some that were beginning to get pretty ripe.  So, I needed some way to use these before they ruined.  It turns out peaches make wonderful country wine and that is what I did with them.


First, I peeled and chopped enough of the remaining peaches to fill a 2-quart jar about 3/4 full.  Then, I made a sugar syrup of 1 cup sugar and 4 cups water.  I poured enough of this over the peaches to cover the peaches.  Then I covered the jar with cheesecloth secured with a rubber band.


The next step is to wait.  While you wait, you have to make sure to stir the mixture well several times a day.  Since I am at work during the day on weekdays, this task fell to Tom, and he did an excellent job!  


After a day or so, the mixture starts to bubble.  This is a sign that yeast is converting the sugar to alcohol and creating carbon dioxide.  This goes on for about a week.  When the bubbling begins to subside, then it is ready to strain and drink.  At this point, it does not contain too much alcohol.  To make a dryer wine, then you would need to transfer it to an air-locked vessel and let it continue fermenting.  The reason for this is that bacteria called "acetobacter" will take up residence in the mixture and begin to convert the alcohol to vinegar.  Acetobacter need oxygen to do this, though.  So, if you put the wine in a air-locked vessel, then the carbon dioxide can escape, but oxygen cannot get in.


I, however, was eager to taste the fruits of my labor.  Plus, I did not have an air-locked vessel.  So, the next step was to strain the mixture.   I set a strainer over a large bowl and dumped the contents of the 2-quart jar into it.  This removed most of the peach pulp.


After this I strained the juice from the bowl through a kitchen towel back into the jar.  


I ended up with about a quart of country wine.


It has a wonderful, peachy sort of sweet/sour taste.  If I do this again next year during peach season, I think I will make more of it and may even explore buying a wine bottle with an air-lock lid so that I can make a dryer wine.